
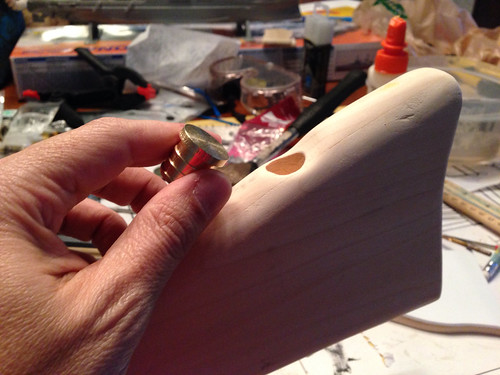
First off for Part 3 — There’s a part of the gun that I’ve seen others include on their guns… and that you can see is visible on the gun in the movie, but I don’t know what it’s for. There are knobs on the top and bottom of the butt of the gun. Something to do with oil and/or cleaning?? In any case, I found some plumbing pieces at Home Depot that seemed like it would fit the bill.

I know I’ve said this before throughout the build process for the gun, but once the knobs were done, “this is where it gets fun!” — paint and electronics!
First a coat of Krylon primer. While it looks cool in the picture, the primer really reveals imperfections in the craftsmanship. It shows where more sanding was needed and where there are small gaps where pieces are glued together. A perfectionist might go back and rework these but I think it still looks awesome and besides, people will generally only see the gun from somewhat of a distance and I’ll be weathering the whole thing anyway so imperfections = battle wear.
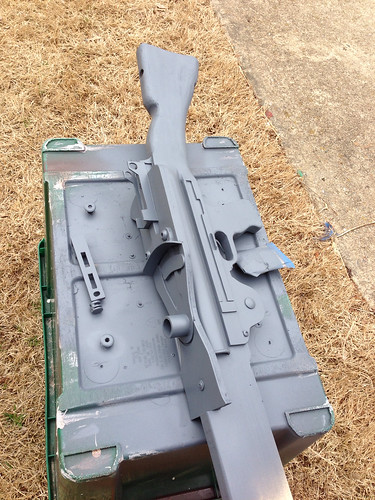
A coat of primer
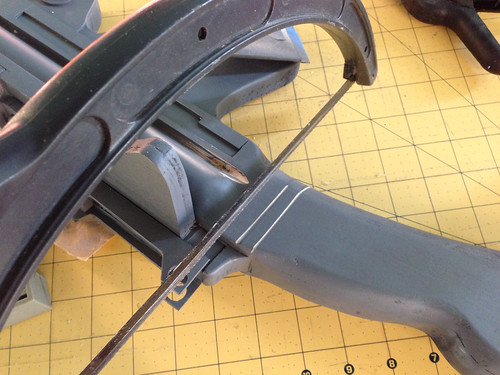
This step maybe should have been done before the primer but I needed to add some details to the gun to delineate where the butt of the gun meets the rest of the gun in the form of shallow parallel grooves. I carefully and slowly did this with a hack saw after penciling in the lines.
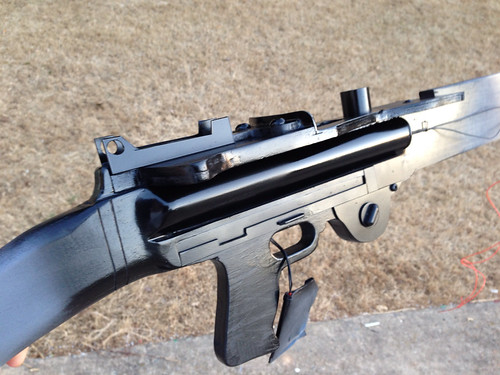
Even with the imperfections revealed, the progress is AWESOME with a coat of black satin spray paint!
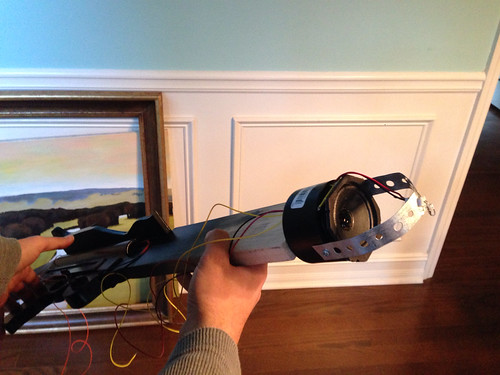
After the paint I was ready to begin installing all of the electronics components. I attached the speaker and LED to the end of the wooden part of the gun that will be covered by the barrel. But… the barrel didn’t fit over the speaker! So either Anthony uses tubing for his gun barrels that are wider than mine or he does the hack that I implemented: Cutting off the corners of the speaker.

Here’s a shot of the speaker and LED light. These will look and sound great coming out of the barrel of the gun! These are both mounted to something that, as you can see, looks kinda like a cap for a can of spray paint, but much thicker and sturdier. Anthony sent the cap with the electronics.
All of the electronics components are installed and I just have to solder the wires to the circuit board.

Here’s a closeup of the power port. The kit comes with a wall charger that simply plugs right into this port. That way I can charge the gun’s battery without pulling the barrel off and setting it aside.

Here you’ll see the housing I built for the trigger piece. I built the “walls” with the plastic styrene to install on either side of the trigger piece to protect it. You’ll see that the top part of the metal tab is hidden between the walls. I tried to protect it as much as possible but still leave enough exposed to allow me to depress the trigger.

A friend of mine helped me solder the wires to the circuit board.
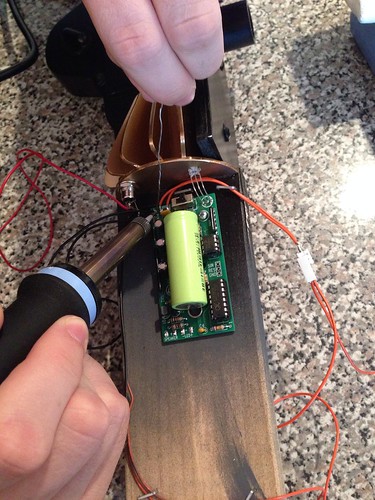
How cool is this?!
OK – I didn’t think this would go into a “Part 4” but I think this is a good place to cut it off for now.