
In Part 1 of my Body Armor posts I covered the basics of trimming return edges and gluing the two pieces of appendages together.
In this post I’ll cover a hodge-podge of other body armor build considerations.
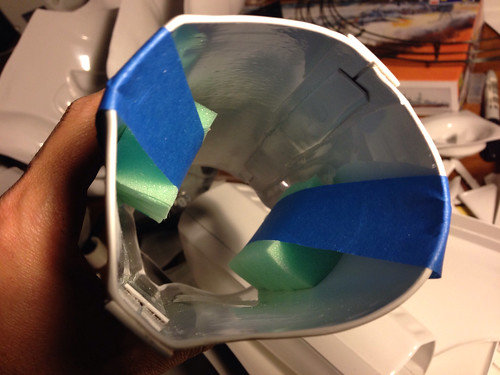
First off, after gluing the arm pieces together I glued some foam into the forearms. The forearms are typically not slimmed down to the size of the wearer. Instead, they are simply trimmed to the natural ridge lines on the armor pieces and then foam is used to hold them in place so they don’t wobble around.
Related to this, here are the parts I DID trim to fit my size:
- Thighs. I had to use large cover strips (1.5″) which I thought was odd and maybe a quirk of MTK. I’m 5’9″ and 160 lbs. I never considered myself stocky before. Maybe my thighs are unusually muscle-y. That’s gotta be it.
- Biceps. These were tough because the bottom opening of the biceps had to be trimmed differently from the top of the biceps for them to feel right on my arms. This resulted in a diagonal cut to trim off excess on the biceps, which made clamping and gluing on a diagonal cut on a curved piece of plastic somewhat difficult.
- Ab/Kidney plate. No biggy here. Just put the armor on, marked the overlap, and cut a straight line.
I didn’t cut the calves to size. I trimmed those like the forearms, meaning according to the ridge lines.
OK – back to the forearms. Final picture:

I almost made a big mistake on the thighs. Actually, I did make a big mistake but luckily for me it was on the bottom of the right thigh which gets covered by another piece. For the arms, every adjoining section between two pieces is covered by a cover strip. So it’s not critical to make a super accurate cut when trimming the excess off in those places. Not so on the thighs. The bottom of the thigh is exposed – no cover strip. Here’s my right thigh after a sloppy cut:

Luckily I learned my lesson on this one so that when I did the left thigh, which doesn’t get covered by another piece, and on which a gap would be totally exposed, I was able to ensure that I left a lot of plastic at the bottom so I could trim it carefully as I glued the two pieces together:
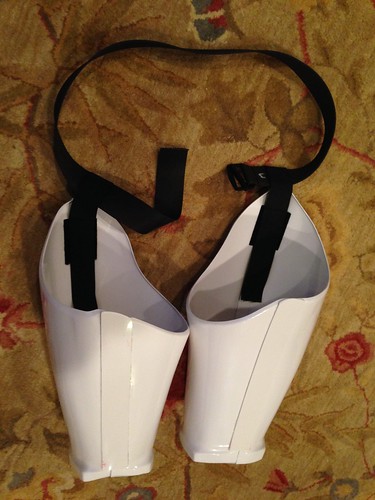
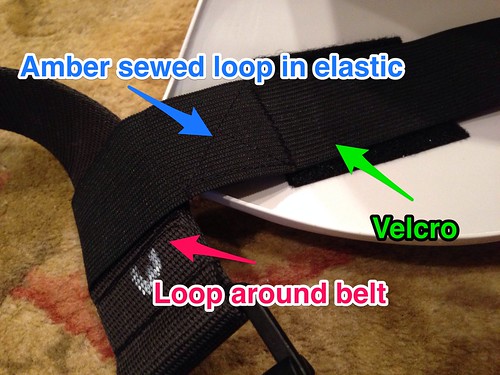
Once the thigh pieces were glued I added the strapping to hold them up. I have a black belt that I wear under the ab piece. Loops attached to the front of the thighs then loop around the belt. The loops are attached to the thigh pieces with industrial-strength velcro so I can adjust them as needed.
My wife, Amber, is contributing all of the sewing skills needed in this project:
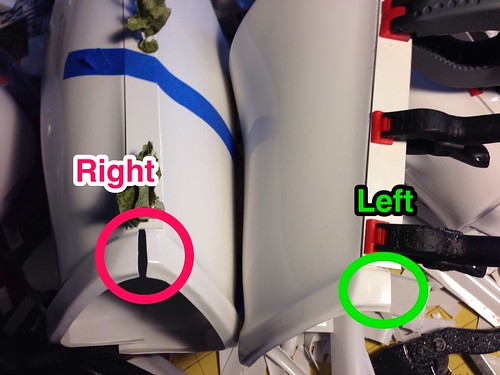
These next two shots show something a little off in the right calf piece. I assume this is an MTK thing, but maybe other armor is like this, too.
You can see that I trimmed the pieces so that the ridge is equal on both sides down the length of the shin. Doing this makes the top part of the calf/shin piece appear uneven:
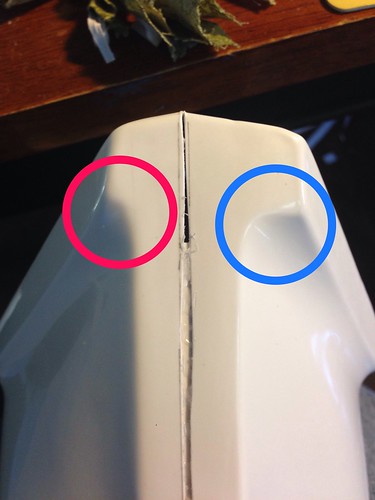

I’ve since learned that little quirks like this really don’t matter at all. I’ve done some test fits and people who see the armor on me don’t notice these little things. They’re too busy being amazed that a stormtrooper is standing in front of them!
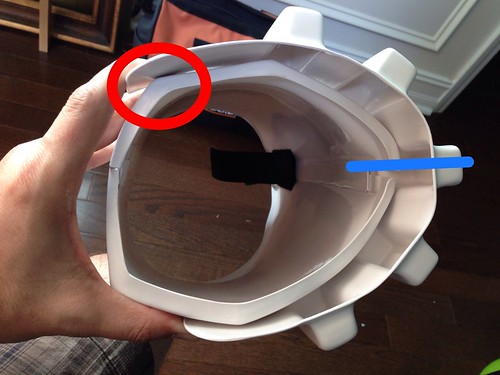
Here’s a shot of the “ammo box” piece that covers the bottom of the right thigh (where I made the mistake with the huge gap). This picture simply shows what that piece would look like if it wasn’t trimmed down. I ended up trimming it down so it didn’t extend past the angle in the red circle.
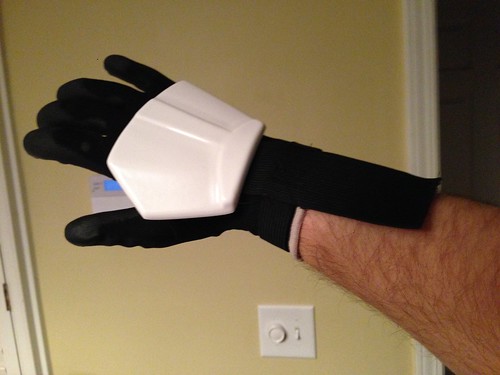
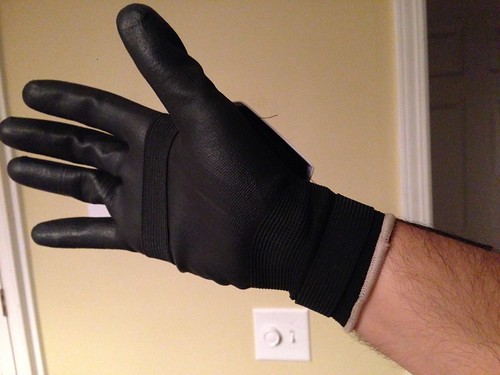
For the hand plates I followed a tutorial I found online to cut and sew patches that have the elastic straps on them. One strap around the hand, the other around the wrist. Then the patch is velcroed to the hand plate. This picture also shows a strap that will end up being velcroed into the forearm piece.
A couple other miscellaneous pictures…
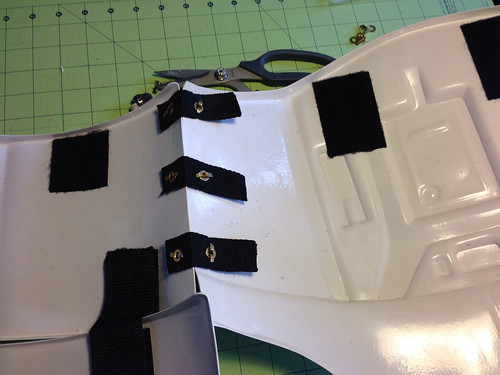
This shot shows how the calf pieces are connected in the back. Every other piece is slipped on — the biceps, forearms, and thighs. But the calves have to remain open in the back to put them on. I elected to use velcro to close them:

Here’s an image from the web of how the cover strips and velcro are attached to minimize the view of the velcro by others:
I wanted to also capture how hard it was to keep the glue in check. It was hard to put enough glue on that there were no gaps between the armor piece and the cover strip but not so much that it oozed out as I clamped the cover strips down. This often resulted in glue messes that had to be cleaned off.
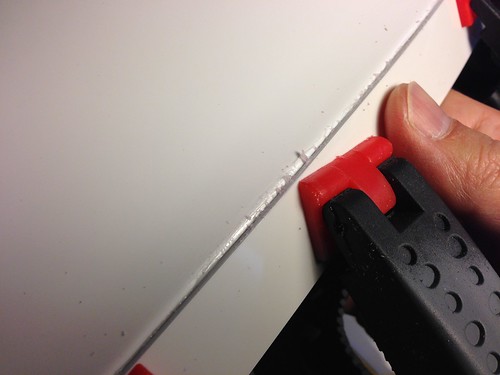
I also had a problem with the red ends of the clamps reacting in some way with the glue to leave red stains on the armor. I don’t have a good picture of this. However neither the glue globs nor the red stains are much of a problem because this is going to be a sandtrooper.
For the sniper plate I had heard of issues with the plate breaking when it is glued securely on but then gets bumped or knocked around in storage. So I followed the advice of someone who piled up a mound of double-sided tape. This way it’s not rock solid and can afford a little movement while still being solid enough to troop without it flopping around.

Lastly, here’s a shot of the ab/torso/back/kidney/butt pieces put together. Sorry – no shots of the trimming. But it was the same process as with other pieces — mark a 1/8″ return edge and trim. Inside, the pieces are put together largely by… yes… industrial strength velcro. Most people use snaps on straps, but I’ve seen snaps fail on other troopers and the velcro is more forgiving, allowing for adjustments as needed. In fact, I did use one heavy duty snap for the crotch piece and on every early test fitting that snap popped off after walking around for only a couple minutes. So I replaced that snap with velcro (but left a dummy snap on the outside to be screen accurate).
The only place where the armor isn’t attached with velcro is in the mandatory left side that has to be connected with split rivets to be accepted by the 501st.
That’s it for this hodge-podge post. The next posts will cover test fittings, paintings, and finishing this thing up!