
I need a prop gun to be accepted into the 501st Legion as an official SandTrooper. At first I considered a small gun, probably just because it would be easier and cheaper than the larger ones. But then someone mentioned that when they troop with their small gun they have a bit of “gun envy” of the guys carrying around the big ol’ guns and I thought, “yeah, I’m gonna want to be one of those guys intimidating people with a huge gun.”
This post will chronicle the steps I took to build the gun. But first let me say that I’ve really enjoyed it! After sitting at a computer all day it’s been really rewarding to glue things together, put wood in my table vice, and hack at it with files and sandpaper, all-the-while listening to OMD or Geography in my headphones.
So here’s the goal (both for the gun and the trooper holding it):
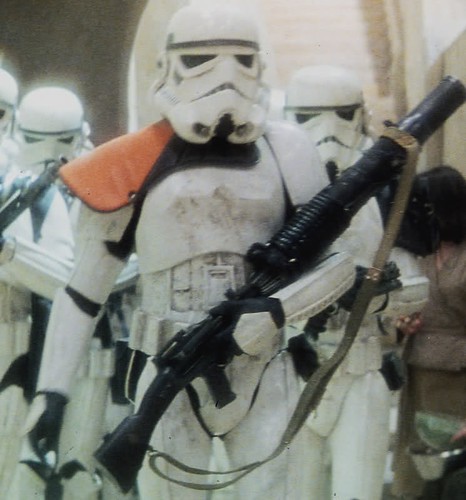
The one in the picture above is called a “T21 Blaster” and is based on the WW1 Lewis Gun, minus the circular bullet magazine that mounts on top, plus some other little cosmetic things to make it more “spacey.” Read more about the original Lewis Gun from Wikipedia here.
Here’s an image from the web of the WW1-era Lewis Gun:

There are people who make the modified star wars ones from scratch and sell them. They are super impressive. They have working sights, electronics components for sound and light, and lithium-ion batteries that plug into the wall to recharge. Price tag? $500. So I decided wood and PVC is cheap, right? I’ll build my own.
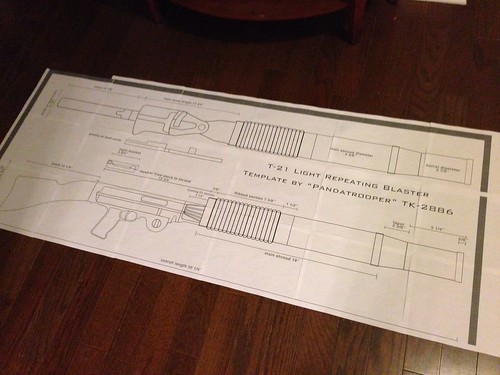
To start I read up on what other scratch-built T21 owners did. A super talented guy that goes by the name of “Panda Trooper” on the forums crafted a template to cut all the parts so I started with that. I would link to his content here but the forums on which its posted are locked down so that only members of the forum can access it. Ping me if interested and I get point you in the right direction.
Here’s a picture of the template printed out on many 8.5×11″ sheets of paper and taped together:
Using a trick learned from old high school art classes I transferred the template designs onto the wood and plastic sheets. First step is to rub graphite all over the backside of the templates.
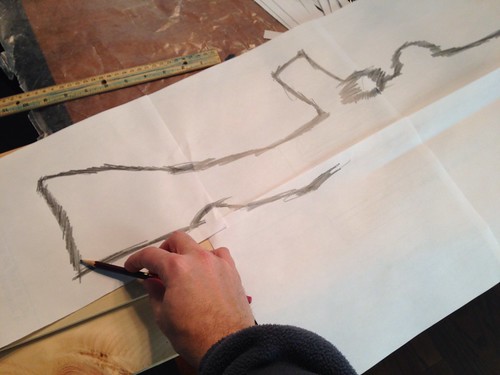
With graphite on the back of the template I simply flipped the template over and traced it to transfer the design:

As with probably all projects, having the right tools really makes a difference. I cut the pieces out using a hand jig saw. I wish I had a nice fancy scroll saw but I suppose the jig saw worked well enough.
The butt of the gun is made from a simple piece of pine shelving with two pieces of 1/4″ wood glued to the sides.
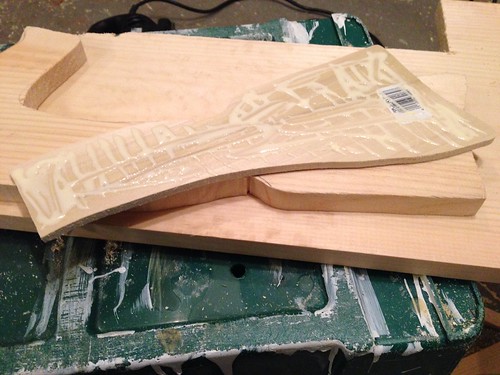
Clamped together to sit overnight to dry:

The following picture shows where the fun part began. I clamped the glued-together pieces into the vice and went to town filing out the curvature of the butt of the gun. I started out, naturally, with really rough-toothed files to eat away at the wood. Then I refined it with other files and sandpaper. This part would have been pretty tough without the table vice.
Here I’ve cut the PVC to length and am getting a sense for the overall look, length, and weight of the gun. It’s HEAVY. The PVC diameters I needed only came in a single gauge option at Home Depot. If I was to start over I’d see what I could do to find thinner PVC.
To replicate the taper that exists on the Lewis Gun I simply grabbed a random plastic cup from the kitchen and hacked it up. Later I glued it into place and took measures to clean up the transition from the cup to the grey PVC.
I used a variety of PVC connectors to replicate details on the barrel where it’s wider. I wanted the inside of the end of the barrel to taper so I cut up a cheap oil funnel I got at Home Depot.

These next pictures show the construction of the cooling fins (or whatever they’re called) that exist both on the Lewis Gun and the Star Wars T21 Blaster. The pieces were all cut out of 2mm styrene plastic I purchased at a hobby store.
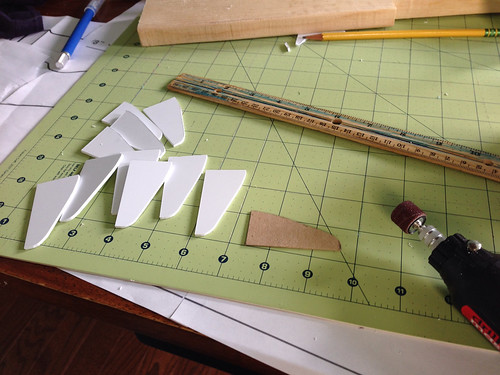
Above you can see that I cut the pieces out roughly with the Xacto craft knife and then refined the shape with a sanding attachment on the dremel.
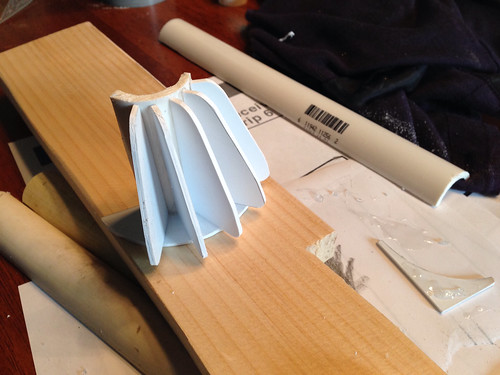
Finished cooling fins:
Here’s my first attempt at smoothing the transition between the cup and the narrower end of the barrel. I had read about others using bondo but I was intimidated by that since I had never used it before and I knew it required mixing two components, etc. So I tried wood filler.
(you can also sort-of see the oil funnel taper)

I sanded it down and it looked like it was going to work:

But… close up and after a shot of paint primer you can see the wood filler definitely did NOT work.

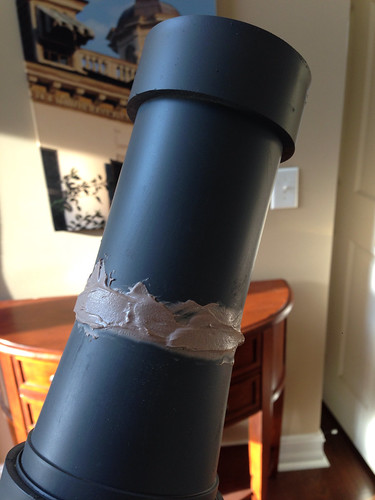
I scraped off the wood filler, bought some bondo, and slapped it on. Not too bad.

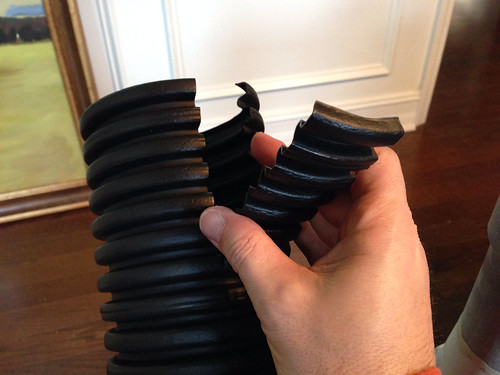
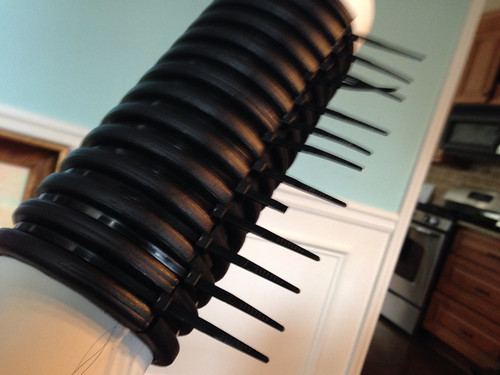
Here I’ve begun working on the ribbing that Star Wars added to the Lewis Gun. This is just 4″ irrigation tubing from Home Depot. Unfortunately they only sell it in 10′ sections, when all I needed was about a foot of it.
The barrel is less than 4″ diameter so I have to cut some out of it to fit it to size.
Then I secured the tubing to the barrel using ties. The heads of the ties will be on the bottom of the gun so they won’t be very noticeable. I cut off the trailing ends of each one of course.
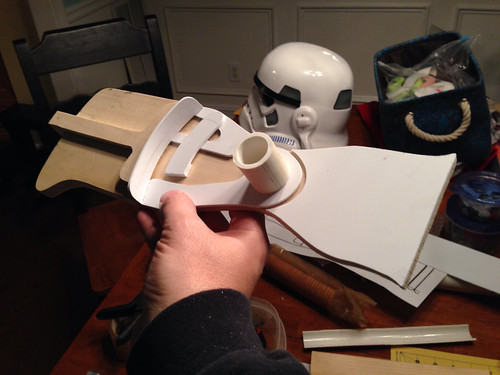
Here’s a shot of the finished “magazine tray” or whatever you call it that sits on top of the gun. I could have taken more pictures along the way but you get the idea. Cut some pieces out of wood, glued, sanded, etc. Then cut other pieces out of plastic, glued, and dremel-sanded to fit the wood.
(note the almost-finished stormtrooper helmet in the background!!)
And… last picture for part 1 — here I’m simply laying pieces down to test the fit. I can’t glue it all together yet because I’m waiting for the electronics components to come in the mail. When they do I’ll have to chisel out part of the side of the wooden part of the gun to install the trigger, fill over the parts I chiseled out (with the wood filler that failed the barrel!), then glue these pieces on top of that.
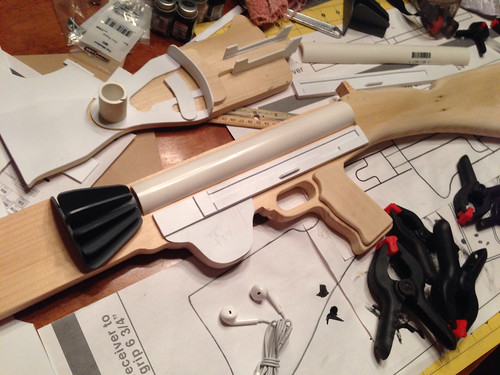
That’s it for now! Hopefully the electronics will be in early next week and I can finish this puppy up!