
For various reasons I ended up having four helmet kits in my possession. Three are from the maker ATA. The last one is an MTK helmet. One of the ATA helmets is a black one. The rest are white.
I built and sold one of the helmets. You can read an archived post of that build here. It’s a decent bucket that I could totally have trooped with but I had others and figured I’d offload that one and try my hand at crafting a couple others.
Of the remaining three, I built two that I’ll keep. And I’m trying to decide what to do with the last (fourth) unbuilt kit.
Regarding the two I’m keeping, I have a black one and a white one. In this post I’ll cover what I did different generally on these two as compared to the first helmet I built, with pictures of just the white one.
There is definitely a difference in building a second and third helmet. The process went much faster. The ears were still a pain, but I learned from the first and built better buckets on the second and third rounds.
What did I do different? Four main things:
- Instead of cutting everything meticulously with an Xacto knife, followed by lots of sanding, I just cut edges quickly with scissors and did little to no sanding. On the helmet, most edges are covered (cap/back/face by the ears, neck area by the neck trim, brow by the brow trim, etc), so no need to really clean those up too much. You can really see this in the pictures below.
- Left a lot more plastic on. I didn’t cut anything on the left/right side of the face piece, and I cut as little as I could off of the neck area. This makes it so I can barely get it on my head. But I figure this is good to make it so little kids can’t see up into the bucket so much.
- The only exception to the above is I cut the ears down more the second time around. This was a nerve-wracking experience because on the first helmet I cut too much off and quickly trashed one set of ears.
- I reinforced the Mic Tip area with bondo rather than glue and canvas. I had learned how to use bondo after my T21 Blaster build and it’s easier to work with.
Here are a few pictures of the build of my second white helmet:


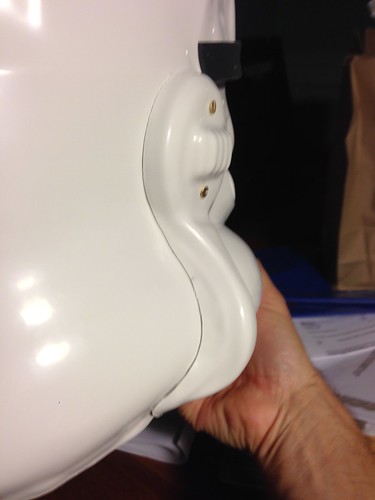
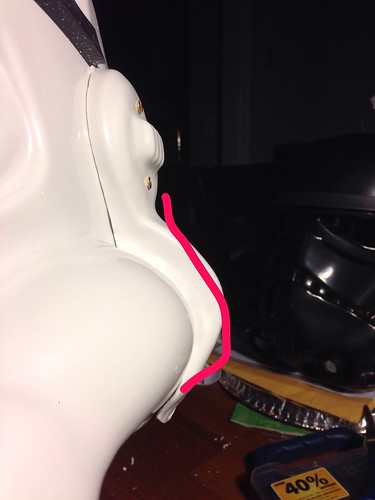
Below is the Left Ear. It’s a little odd how different the sculpt shape is of the right and left ear on ATA. I’ve roughly drawn with a pink line the nicer (in my opinion) shape of the right ear.
The left ear gave me more trouble than the right one (in fact I had to resort to using ATA’s second set of ears for the left ear because I messed up on the first one). Here’s a picture of how I had to elongate the drilled holes to move the ear down to get it to fit the way I wanted it to. (Also notice how jagged/rough/unfinished the cut job is on the cap & back piece – but no worries! It’s all covered up!)

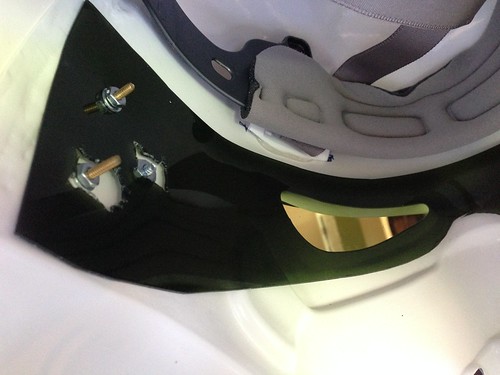
The below picture shows two things.
- How I screwed in the bottom ear screw at an angle rather than straight up into the tube. This looks a little funny when you look at it closely, but I felt it was necessary to keep the ear snug against the tube at the bottom. Otherwise it felt like it would want to flare out around the tube. Perhaps the veteran pros out there know the better way to do it.
- You can also see how much plastic I left around the neck. I just covered all of that up later with the neck trim piece (oh – and, again, how rough the cut is).

Here’s the crude but “it works” solution for the lens. I’d be interested in knowing whether others cut down the ear screws with a hack saw or something. They do touch the sides of my head when the helmet is on and I’m thinking that’s not the safest thing.


Finished White Helmet #2!
